Fix Your Carpet, Save Your Deposit! How Repairs Can Help You Get Your Apartment Deposit Back

When it’s time to move out of a rental, the condition of your carpet can make or break your chances of getting your security deposit back. Stains, burns, or tears on the carpet are some of the most common reasons landlords withhold deposits. Luckily, with proper repair, you can restore your flooring, impress your landlord, and secure your hard-earned money.

In this article, we’ll cover why carpet damage matters, the benefits of repairing it, and how to ensure your apartment is move-out ready.

Why Carpet Damage Impacts Your Deposit

Most leases include a clause about maintaining the property’s condition. While normal wear and tear is expected, significant damage to carpets—like stains, burns, or tears—can be considered tenant negligence. Landlords may deduct the cost of replacement or repairs from your deposit. To avoid this, addressing carpet issues before moving out is essential.

Common Carpet Issues and How to Fix Them

1. Stains and Spills

From red wine to pet accidents, stains are a common culprit for damaged carpets. To fix them:

  • Blot the stain immediately with a clean cloth.
  • Use a carpet-safe stain remover to lift tough marks.
  • For stubborn stains, consider professional cleaning services.

2. Burns

Burns from cigarettes, candles, or irons can leave noticeable marks. repair techniques like patching or fiber replacement can effectively fix these issues.

3. Tears and Loose Seams

Small tears or frayed seams can worsen over time. Repairing these issues with adhesive, seam tape, or stitching can make your carpet look as good as new.

4. Ripples and Wrinkles

Carpet stretching is a common solution for ripples. Professionals use specialized tools to tighten the carpet and remove tripping hazards.

The Benefits of Carpet Repair Before Moving Out

  1. Save Money on Replacement Costs Replacing a carpet is expensive and often unnecessary for minor damage. Repairs are cost-effective and can restore your carpet’s appearance.
  2. Leave a Good Impression A well-maintained apartment shows respect for the property and increases the likelihood of a full deposit refund.
  3. Avoid Disputes with Landlords Handling repairs in advance prevents disagreements about the condition of the carpet during the move-out inspection.
  4. Eco-Friendly Option Repairing your carpet reduces waste by extending its life instead of discarding it prematurely.

DIY Carpet Repair vs. Professional Services

While small issues like minor stains can be handled with DIY methods, larger problems often require professional expertise. Professional repair services ensure:

  • Seamless patching and blending
  • Effective solutions for complex issues
  • High-quality results that satisfy landlords

Contact Us for Expert Repair Services

Don’t let carpet damage jeopardize your deposit! Our team specializes in affordable and effective End of Lease Carpet Repair Services in Brisbane to ensure your rental is move-out ready. From fixing burns and tears to removing stubborn stains, we’ve got you covered.

Contact us today to schedule a consultation and take the stress out of moving!

Final Thoughts

Your security deposit is a valuable asset, and protecting it should be a priority when moving out. By addressing carpet issues with professional or DIY repairs, you can save money, leave a positive impression, and avoid disputes with your landlord. With these tips and tricks, you’ll be one step closer to a stress-free move and a full deposit refund. Don’t wait—start your repair process today!

Frequently Asked Questions (FAQs)

Q1: Is repair worth the cost if I’m moving out?

Absolutely! The cost of repairs is often far less than the amount deducted for carpet replacement.

Q2: Can all carpet damage be repaired?

Most damage, including stains, burns, and tears, can be fixed. However, if the carpet is extremely old or heavily damaged, replacement may be the only option.

Q3: How long does carpet repair take?

Small repairs can take an hour or less, while more extensive repairs might require a few hours. Professional services ensure timely and efficient results.

Q4: Should I clean my carpet before moving out?

Yes, a deep cleaning can remove dirt and odors, improving your carpet’s overall appearance. Some landlords may even require professional cleaning before the move-out.

Q5: How do I find professional repair services?

Search for reputable companies in your area with good reviews. Look for services that specialize in rental property repairs.

Published on: January 29, 2025

Carpets are an essential part of home décor, adding warmth and comfort to any space. However, daily wear and tear, accidental spills, or pet damage can leave your carpet with unsightly stains, tears, or holes. While replacing the entire carpet is one solution, it can be costly and time-consuming. A practical alternative is carpet patching—a method to repair small damaged areas using leftover carpet or a matching piece.

If you’re considering tackling this project yourself, here’s a complete guide to DIY carpet patching, including tips, tools, and when to seek professional help.

What Is Carpet Patching?

Carpet patching is a carpet repair technique that involves removing the damaged portion of your carpet and replacing it with a matching piece. This method works best for localized damage, such as:

  • Burns caused by cigarettes or candles
  • Permanent stains that can’t be removed
  • Tears or rips from furniture or accidents
  • Pet damage, such as scratches or chewed fibers

It’s a cost-effective way to repair carpet without needing to replace the entire flooring.

Can You Patch a Carpet Yourself?

Yes, you can patch a carpet yourself with the right tools, materials, and patience. DIY carpet patching is ideal for small, manageable damage, and it’s a great way to save money. However, achieving a seamless look can be challenging, especially if the carpet is old, faded, or has a complex pattern.

Tools and Materials You’ll Need

Before starting, gather these essential tools and materials:

  • A piece of matching carpet (from leftovers or a hidden area like a closet)
  • Utility knife or carpet cutter
  • Carpet adhesive, double-sided carpet tape, or heat-activated seam tape
  • Measuring tape
  • Marker or chalk
  • Scissors
  • Seam roller or a heavy object for pressing

Step-by-Step Guide to DIY Carpet Patching

Follow these steps to patch your carpet effectively:

1. Evaluate the Damage

Begin by assessing the size and location of the damage. Carpet patching works best for small areas of damage that don’t affect the overall structure of the carpet.

2. Find a Matching Piece

Use leftover carpet from the original installation or take a small piece from a hidden area like a closet. Ensure the replacement piece matches the color, texture, and direction of the carpet fibers.

3. Prepare the Damaged Area

Use a utility knife or carpet cutter to carefully cut out the damaged section. Cut in a rectangular or square shape for easier replacement. Ensure the edges are clean and straight.

4. Cut the Replacement Patch

Place the damaged piece over the matching carpet remnant and use it as a template to cut the replacement patch. This ensures the patch fits perfectly into the cut-out area.

5. Secure the Patch

Apply carpet adhesive or double-sided carpet tape to the edges of the cut-out area. For a stronger hold, you can use heat-activated seam tape and a seam iron to bond the patch securely.

6. Align and Insert the Patch

Carefully place the replacement patch into the cut-out area, ensuring the pile direction matches the surrounding carpet. Press it firmly to ensure a snug fit.

7. Blend the Edges

Use a seam roller or a heavy object to blend the edges of the patch with the existing carpet. This helps the fibers integrate and minimizes visible seams.

8. Trim Excess Fibers

Inspect the patch and trim any uneven fibers with scissors for a smooth and uniform finish.

Pros and Cons of DIY Carpet Patching

Pros:

  • Cost-effective compared to professional services
  • Allows you to address minor damage quickly
  • A rewarding experience for DIY enthusiasts

Cons:

  • Requires precision and patience to achieve a seamless look
  • Matching older or faded carpets can be challenging
  • May not be suitable for extensive or complex damage

When to Call Professionals

While DIY carpet patching is suitable for small-scale damage, there are situations where professional help is recommended:

  1. Large or Widespread Damage: Extensive damage may require advanced tools and techniques that only professionals can provide.
  2. Complex Patterns or Textures: Matching intricate designs or unique textures can be difficult without expertise.
  3. Structural Issues: If the carpet backing or padding is damaged, professional repair is essential to ensure durability.

For expert assistance, consider contacting Carpet Patching Services in Brisbane for seamless and long-lasting results.

Tips for Successful DIY Carpet Patching

  • Practice on a Hidden Area: Test your skills on a less visible section of the carpet before attempting the repair in a prominent area.
  • Save Remnants: Always keep leftover carpet pieces after installation for future repairs.
  • Clean Before Starting: Vacuum the damaged area to remove dirt and debris before patching.
  • Take Your Time: Rushing can lead to mistakes, so work slowly and carefully for the best outcome.

Conclusion

DIY carpet patching is a practical and cost-effective solution for repairing small areas of damage and extending the life of your carpet. With the right tools, materials, and techniques, you can restore your carpet’s appearance and avoid the expense of a full replacement.

However, for larger or more complex damage, seeking professional help is often the best choice. Experts in Carpet repair have the skills and experience to handle even the most challenging repairs, ensuring your carpet looks as good as new.

Whether you choose to DIY or hire professionals, addressing carpet damage promptly is key to maintaining the beauty and functionality of your flooring. A well-maintained carpet not only enhances your home’s aesthetic appeal but also adds comfort for years to come.

Published on: January 27, 2025

Are your carpets in Ormeau looking worn, damaged, or stretched? Don’t worry, Invisible Carpet Repair Brisbane is here to restore them to their former beauty. With our expert carpet repair services in Ormeau, we tackle a wide range of issues from burn marks and pet damage to seams, holes, and general wear and tear.

Our team of skilled professionals specialises in making repairs that are virtually invisible, ensuring your carpets look as good as new without the need for a full replacement. Whether it’s fixing unsightly burns, re-stretching loose carpets, or patching up holes, we offer fast and reliable solutions that suit your needs.

Our Carpet Repair Services in Ormeau Include:

  • Carpet burn repairs
  • Carpet pet damage restoration
  • Carpet hole fixing
  • Carpet seam repairs
  • Carpet restretching and tightening
  • Carpet patching

At Invisible Carpet Repair Brisbane, we are dedicated to providing the highest level of service, ensuring that your carpets look flawless once we’re done. With same-day service availability and 24/7 emergency support, you can count on us to handle any carpet issue quickly and efficiently.

Why Choose Us for Carpet Repair in Ormeau?

  • Experienced and certified technicians
  • Same-day and emergency services available
  • Affordable pricing
  • Free quotes with no obligations
  • Exceptional customer service

We’re proud to serve the Ormeau community with professional carpet repair solutions that are tailored to your needs. Let us handle your carpet concerns with care and expertise.

Contact us today at 07 4516 1309 for a free quote or to book our carpet repair services in Ormeau. Experience the Invisible Carpet Repair Brisbane difference!

Published on: October 19, 2024

Bissell carpet cleaners offer an effective and convenient way to deep clean carpets, removing embedded dirt, stains, and grime. Whether you’re a new user or seeking tips to maximize your cleaning process, this comprehensive guide will walk you through the steps of using a Bissell carpet cleaner to achieve professional-quality results and revive the freshness of your carpets.

Step 1: Preparing the Bissell Carpet Cleaner

Start by familiarizing yourself with the components of the Bissell carpet cleaner. Fill the clean water tank with hot tap water and the recommended amount of Bissell carpet cleaning formula according to the instructions provided. Ensure the dirty water tank is empty and properly inserted.

Step 2: Prepping the Area

Before cleaning, remove any furniture or obstacles from the carpeted area you intend to clean. Vacuum the carpet thoroughly to eliminate loose dirt, debris, and pet hair. Treat any visible stains or spots with a pre-treatment solution if recommended by the Bissell instructions.

Step 3: Operating the Bissell Carpet Cleaner

Turn on the Bissell carpet cleaner and adjust the settings based on the cleaning requirements and carpet type. Begin cleaning in a corner of the room farthest from the exit to avoid walking on freshly cleaned areas.

Step 4: Cleaning Technique

Using the Bissell cleaner, slowly push the machine forward to dispense the cleaning solution onto the carpet. Pull the machine backward while pressing the trigger to suction up the dirty water and excess solution. Overlap each pass slightly to ensure thorough cleaning and avoid over-wetting the carpet.

Step 5: Dealing with Stubborn Stains

For tough stains or high-traffic areas, consider making multiple passes with the Bissell carpet cleaner. You can also pause over stubborn spots, allowing the cleaning solution to dwell for a few moments before extracting it.

Step 6: Emptying and Refilling Tanks

Monitor the dirty water tank and empty it as needed during the cleaning process. Refill the clean water tank and replace the cleaning solution when required, following the manufacturer’s guidelines for dilution and type of solution.

Step 7: Drying the Carpet

Once the cleaning is complete, empty and rinse the dirty water tank. Run the Bissell machine over the carpet once more with clean water only to rinse out any remaining cleaning solution. Allow the carpet to air dry completely before walking on it or replacing furniture.

Step 8: Maintenance and Storage

After use, clean the Bissell carpet cleaner by rinsing its components and wiping it down. Properly store the machine in a dry and well-ventilated area, ensuring all parts are dry to prevent mold or mildew growth.

Conclusion

Using a Bissell carpet cleaner effectively involves proper preparation, technique, and maintenance. By following these steps, you can efficiently deep clean your carpets, remove stains, and maintain a fresh and inviting home environment. Regular use of your Bissell carpet cleaner helps extend the lifespan of your carpets and keeps them looking their best. You can always hire our local carpet repair experts.

Published on: December 12, 2023

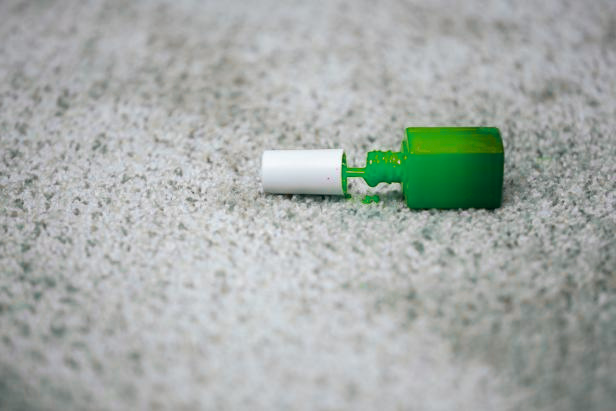
No need to stress over a nail polish spill on your carpet! This blog is here to provide you with effective guidance. We’ll share proven techniques using everyday items like rubbing alcohol, hairspray, and nail polish remover. Many people mistakenly believe that nail polish stains are impossible to remove from carpets, but that’s not the case. We’ll show you some simple home remedies to help you eliminate nail polish stains from your carpet using do-it-yourself methods, even for those tricky, stubborn stains.

Also with the help of this guide, you are going to learn about the DIY methods that are available out there. To know more follow the guide.

Do You Think It Is Impossible To Clean The Nail Polish Stains? 

Nail polish is primarily composed of polymers such as ethyl or butyl acetates dissolved in a liquid form. When the liquid part (usually alcohol) evaporates, it leaves behind a thin layer or film of polymer, which is typically applied to nails. When nail polish spills on a carpet, it forms a layer on the carpet’s surface. This can penetrate deep into the carpet fibers, even if it’s not immediately visible to the naked eye. Over time, it can create an unsightly stain that affects the carpet’s appearance. Therefore, it’s crucial to address nail polish stains promptly. Here’s what you can do to tackle the issue on your own. To do so, you can use:

  • Nail polish remover
  • Hair spray
  • White vinegar

1. Nail Polish Remover 

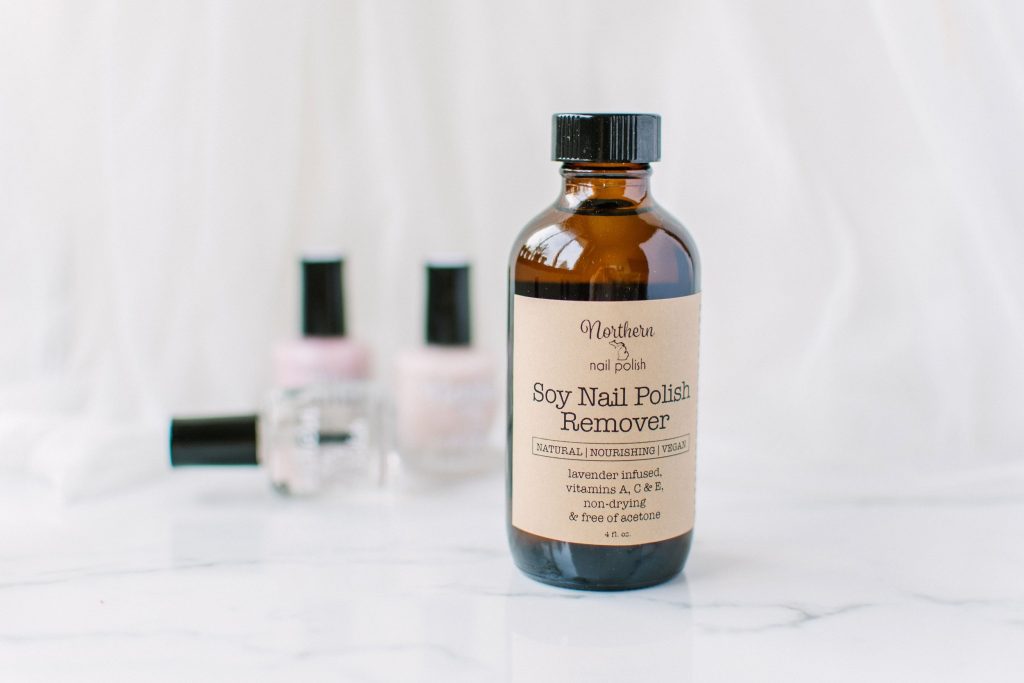
You need to consider the colour of the carpet, before planning on how to get nail polish out of the carpet. If the carpet colour is light coloured or white then you need to take different measures. In such a case, using a non-acetone nail polish remover would help. Just make sure the nail polish remover that you use is a clear one with no additional ingredients such as colours. The nail polish remover that has colour can do more harm than good. so it is better to prefer a colourless one. 

Nail polish remover

How To Do It: 

  • You should collect the excess nail polish before it dries completely. You can use a spoon or a scraper. 
  • Now you need to scrub the area using a toothbrush so that the nail polish remover will penetrate deep into the carpet fibres. 
  • In a circular motion, you need to scrub it religiously so that the stain comes off. After this, you need to thoroughly wash it. 
  • Let the carpet air dry, once it’s dried completely you will have a spotless carpet. 

2. Hair Spray

If your carpet is dark-coloured, using rubbing alcohol or hairspray can be effective in removing the nail polish stain. Avoid using nail polish remover, as it could potentially bleach your carpet’s colour. It may come as a surprise to many, but hairspray can work wonders in eliminating even the toughest nail polish stains. Here’s how to do it:

Hair Spray

How To Do It: 

  • Firstly you should dab the wet nail polish film using a paper towel. This helps in absorbing the excess liquid from the carpet. 
  • In case the nail polish is dry, then you need to scrap it with the help of a knife. 
  • Then you need to wet the area by pouring a small quantity of water. 
  • Soak the area with the help of hair spray by using 15 to 20 pumps. 
  • Now with the help of a toothbrush, you need to scrub the carpet in a circular motion. 
  • At this point, you need to add a small amount of rubbing alcohol to the area.
  • Now wash the carpet thoroughly using plain water. 
  • Let it dry for some time then you will have flawless carpets that are free from nail polish stains. 

3. White Vinegar 

There isn’t anything that the white vinegar can’t clean! Yes, You got that right. In the same way, white helps get rid of nail polish stains as well. 

White Vinegar 
Close-Up Of Vinegar Text On Glass Bottle Against Gray Background

How To Do It: 

  • You need to use undiluted white vinegar to perform this procedure to get the best results. 
  • You need to apply a general amount of white vinegar to the stain. 
  • Next, you need to place a paper towel on it and let it sit for a while. 
  • Follow it up by scrubbing the area with the help of a toothbrush in a circular motion.  
  • You need to continue this until you can see the difference. As vinegar helps in breaking the fresh nail polish it makes it here for you to clean. 
  • With the use of plain water, rinse the area thoroughly. 
  • Repeat the procedure if it’s necessary and let the carpet dry after completing the process. 

Conclusion

These methods will help you in removing the nail polish from the carpet. Do not just look for ways to sign off your carpet. Look out for options on how to get nail polish out of the carpet, if necessary. This way, you can get the best results out of these DIYs. In case you are not satisfied with the results you can ask professionals to do the job for you. Hire us for same-day carpet stain removal and restretching carpet Brisbane at an affordable cost.


Also Read:

Published on: October 28, 2023

Carpeted hallways and rooms are a common feature in many homes. They provide a comfortable and quiet surface for foot traffic and can help to reduce noise in the home. However, over time, even the best-kept carpeted hallways and rooms can develop wrinkles, loose yarns, snags and bumps, which not only look unsightly but also pose a tripping hazard. Fortunately, repairing loose yarns and snags is a relatively straightforward process that can be done with just a few basic tools and materials. In this blog post, we’ll walk you through the steps required to fix loose yarns and snags.

Follow These Steps To Fix Loose Yarns And Snags On Your Carpets:

Step 1: Identify The Cause Of Loose Yarns And Snags

Before you can begin repairing the loose yarns and snags, you need to identify the root cause of the problem. There are several reasons why carpet loose yarns and snags may occur, including poor installation, heavy foot traffic, and temperature and humidity changes. If the wrinkles, loose yarns and snags are the results of poor installation, you may need to consider reinstalling the carpet. However, if the wrinkles are the result of wear and tear, you can proceed with the following steps.

Step 2: Gather Your Tools and Materials

To repair the carpet wrinkles, loose yarns and snags, you’ll need a few basic tools and materials. Here’s what you’ll need:

  • A carpet stretcher
  • A knee kicker
  • A power stretcher (optional)
  • A utility knife
  • Carpet adhesive
  • Carpet seam tape
  • A putty knife
  • A hammer
  • A measuring tape

Step 3: Stretch the Carpet

The first step in repairing carpet wrinkles, loose yarns and snags is to stretch the carpet back into place. You’ll need to start at one end of the carpet and work your way towards the other end. Begin by using a knee kicker to stretch the carpet at one end. If the wrinkles are particularly severe, you may need to use a carpet stretcher or a power stretcher to get the carpet back into place.

Step 4: Cut the Excess Carpet

Once you’ve stretched the carpet, you may notice that there is some excess material that needs to be trimmed. Use a utility knife to cut the excess carpet as close to the wall as possible.

Step 5: Glue the Carpet Down

To prevent the carpet from wrinkling again, you’ll need to glue it down. Apply carpet adhesive to the back of the carpet, then use a putty knife to spread it evenly across the surface. Next, carefully lay the carpet back down and use a carpet roller to press it firmly into place.

Step 6: Tape the Seams

If there are loose seams in your carpet, you’ll need to tape them to prevent them from separating. Use carpet seam tape to join the seams, then use a hammer to tap the tape firmly into place.

Step 7: Allow the Carpet to Settle

After you’ve repaired the carpet wrinkles, loose yarns and snags, it’s important to allow the carpet to settle for at least 24 hours before walking on it. This will give the adhesive time to dry and ensure that the carpet remains in place.

Benefits Of Repairing Carpet Wrinkles, Loose Yarns And Snags

  • Improves safety by removing tripping hazards.
  • Restores the appearance of the carpet.
  • Extends the lifespan of the carpet.
  • Reduces wear and tear on the carpet fibres.
  • Enhances the comfort and quietness of the carpet area.
  • Prevents further damage to the carpet and subfloor.
  • Saves money compared to replacing the entire carpet.
  • Increases the value of your home by maintaining the quality of your flooring.

Why Hire Professionals?

While repairing a wrinkled carpet may seem like a simple task, it’s important to consider the expertise and experience required to do the job correctly. Hiring professionals for carpet repair services can ensure that the job is done quickly and effectively, with minimal disruption to your daily routine. Professionals have the proper tools, materials, and techniques to get the job done efficiently and to the highest standard. They can also identify and repair any other carpet issues, such as ripples or tears, that you may not have noticed. 

Conclusion

Repairing carpet wrinkles, loose yarns and snags is a straightforward process that can be completed with just a few basic tools and materials. By following the steps given above, you can restore your carpet to its original condition and ensure that your carpet area remains a safe and comfortable space.

In case you are looking for top-class carpet repair services in Brisbane, you must choose the professionals at Invisible Carpet Repair Brisbane. We are the most trusted carpet repair service provider in Brisbane. So, whether you’re dealing with a single wrinkled hallway carpet or require a more extensive carpet repair service, hiring professionals can save you time, and money, and ensure a job well done.


Also Read:

Published on: April 10, 2023

Carpeting is a popular and versatile flooring option, chosen for its warmth, softness, and aesthetic appeal. However, it is not immune to damage, especially when it comes to heavy foot traffic or furniture dragging. Carpet holes can be an eyesore and pose a tripping hazard, so it’s important to address them as soon as possible. In this blog, we’ll discuss How to Patch Small Holes in Your Carpet and restore your carpet to its former glory.

Types Of Carpet Holes:

There are different types of carpet holes, including:

  • Burn Holes: Caused by cigarettes, embers or hot objects placed on the carpet.
  • Pet Damage Holes: Caused by scratching or digging by pets.
  • Furniture Indentation Holes: Caused by heavy furniture placed on the carpet for extended periods.
  • Moth and Insect Holes: Caused by moth or insect infestations that eat away at the carpet fibres.
  • Wear and Tear Holes: Caused by foot traffic over an extended period.

The type of hole will determine the best method for repair, and it’s important to identify the type of hole before starting the repair process.

Follow These Steps To Patch Small Holes In Your Carpet:

Step 1: Assess the Damage

The first step in fixing carpet holes is to assess the extent of the damage. The size, shape, and location of the hole will determine the best course of action. If the hole is small (less than an inch in diameter) and located in an inconspicuous area, you may be able to repair it yourself using a few simple tools. This step is very important to fix carpet holes. However, if the hole is large, irregularly shaped, or located in a high-traffic area, it may be best to call in a professional carpet repair service.

Step 2: Gather Your Tools

To repair a small carpet hole, you’ll need the following tools:

  • Carpet scissors or a sharp utility knife
  • A ruler or measuring tape
  • A piece of spare carpet
  • A hot glue gun or carpet adhesive
  • A metal straight edge
  • A carpet seam roller

If you don’t have a spare piece of carpet, you can use a small piece of carpet from a closet or other hidden area of the room. Alternatively, you can purchase a remnant of carpet from a flooring store.

Step 3: Cut a Patch

Using a ruler or measuring tape, measure the size of the hole and cut a piece of spare carpet to fit. The patch should be slightly larger than the hole to ensure a snug fit. Use the metal straight edge to guide your cutting, and be sure to cut through both the patch and the existing carpet.

Step 4: Glue the Patch

Using a hot glue gun or carpet adhesive, apply a small amount of glue to the edges of the hole. Carefully place the patch over the hole, making sure it lines up perfectly with the surrounding carpet. Use a carpet seam roller to press down on the edges of the patch and ensure a strong bond.

Step 5: Trim the Edges

Using carpet scissors or a sharp utility knife, trim any excess carpet fibres from the edges of the patch. Be careful not to cut the surrounding carpet.

Step 6: Blend the Patch

To make the patch less noticeable, use a clean, dry towel to blend the edges of the patch with the surrounding carpet fibres. Rub the towel back and forth in the direction of the fibres to create a seamless transition.

Step 7: Allow the Glue to Dry

Allow the glue to dry completely before walking on the patched area. This will ensure that the patch is securely attached to the carpet and will not come loose.

Why Hire Professionals? 

While small carpet holes can be repaired with DIY methods, larger or more complicated holes may require professional assistance. Hiring a professional carpet repair service can ensure that the repair is done properly and with high-quality materials, which will result in a more durable and long-lasting repair. Professionals can also provide additional services such as cleaning and stretching, which can improve the overall appearance and longevity of your carpet. Additionally, hiring a professional can save you time and effort, allowing you to focus on other tasks while they take care of the repair.

Conclusion

Fixing carpet holes can be a simple DIY project or require professional assistance depending on the size, shape, and location of the hole. Small carpet holes can be repaired using a few basic tools, such as carpet scissors or a sharp utility knife, a spare carpet, a hot glue gun or carpet adhesive, a metal straight edge, and a carpet seam roller. With a little patience and attention to detail, you can restore your carpet to its original condition and avoid the need for a costly replacement. If you’re looking for a professional carpet repair service to fix burn holes in your carpet, consider reaching out to Brisbane. Our team of experienced professionals can provide top-notch carpet burn repair services that will restore your carpet to its original condition.


Also Read:

Published on: April 10, 2023

Carpet burns are a common problem that many homeowners face. They can occur due to a variety of reasons, such as dropped cigarettes, hot hair styling tools, or hot objects placed on the carpet. Carpet burns damage the carpet’s appearance and also cause a fire hazard if left untreated. While some homeowners might be tempted to try to fix the problem themselves, carpet burn repair left to the professional is the best choice. We have discussed here how to fix scorch marks on your carpet. You can follow this stepwise to restore burnt carpets. 

How to Fix Scorch Marks on Your Carpet?

Scorch marks on your carpet can be unsightly and difficult to remove, but with the right techniques and tools, you can fix them. Here are some steps to follow:

  1. First, assess the damage. If the scorch mark is deep and has melted fibres, it may be impossible to fix. If it’s a surface mark, you may be able to remove it.
  2. Trim away any burnt or melted fibres with scissors or a utility knife. Be careful not to cut too much or make the hole larger.
  3. Use a vacuum cleaner or a soft-bristled brush to remove any loose debris from the area.
  4. Apply a small amount of rubbing alcohol to a clean white cloth and gently blot the scorch mark. Be careful not to rub, as this can damage the carpet fibres.
  5. If the scorch mark is still visible, mix equal parts white vinegar and water in a spray bottle. Spray the affected area and let it sit for a few minutes.
  6. Blot the area with a clean white cloth until the stain is removed.
  7. Rinse the area with clean water and blot dry with a clean cloth.
  8. If the scorch mark is still visible, you may need to use a carpet stain remover. Test it on an inconspicuous area first to make sure it doesn’t damage the carpet.
  9. Apply the stain remover according to the manufacturer’s instructions and blot the area with a clean cloth.
  10. Rinse the area with clean water and blot dry with a clean cloth.

With these steps, you should be able to remove scorch marks from your carpet. However, prevention is always better than cure, so be careful when using hot appliances near your carpet and always use protective materials to prevent accidents.

Problems You May Face In Following DIY Carpet Burn Repair Steps:

  • DIY Carpet Repair Can Make the Problem Worse

Carpet burns are not only unsightly, but they can also be dangerous. If you try to repair the burn yourself, you could end up making the problem worse. For example, you may inadvertently spread the burn or make the damaged area larger. This will only make the repair more complicated, and it could even require replacing the entire carpet.

  • It’s Difficult to Match the Original Carpet

Carpets come in a variety of colours, textures, and patterns. Trying to match the original carpet can be challenging, especially if it’s an older carpet that’s no longer available in stores. A mismatched patch will stand out like a sore thumb and look even worse than the original burn.

  • DIY Carpet Repair Can be a Fire Hazard

Carpet burns can be a fire hazard, especially if the damaged area is near an electrical outlet or a heating vent. Attempting to repair the burn yourself without the proper tools and materials can also be a fire hazard. You may not use the right adhesive or patch material, which can catch fire and spread quickly.

  • DIY Carpet Repair is Time-Consuming

Repairing a carpet burn requires time, patience, and skill. You’ll need to remove the damaged fibres, patch the area, and blend the new fibres with the existing carpet. Even if you’re handy, it can take several hours to complete the repair. If you don’t have the time or patience to do it right, it’s better to hire a professional.

  • You May Void the Carpet Warranty

Most carpets come with a warranty that covers manufacturing defects and installation issues. If you try to repair the carpet yourself, you may void the warranty. This means that if you have any future problems with the carpet, you won’t be able to get it repaired or replaced for free.

Why Book Professional Carpet Repair Services?

If you’ve accidentally damaged your carpet, whether it’s from a cigarette burn, pet damage, or spillage, it can be tempting to try to fix it yourself. However, hiring professionals for carpet burn repair and other repair services has several benefits. First, professionals have the necessary tools and expertise to fix the damage without causing further harm to your carpet. They can repair the damage in a way that matches the original texture and colour, ensuring that the repair is seamless. Additionally, hiring professionals saves you time and effort, allowing you to focus on other important tasks while they take care of the repairs. Moreover, professional repair services are often backed by a warranty, giving you peace of mind that you won’t have to worry about the same damage recurring.

Conclusion

Attempting to repair a carpet burn yourself can be time-consuming, dangerous, and could even cause a fire hazard. Hiring a professional to repair your carpet burn is the safest and most effective solution. Professional repairs are guaranteed, and you’ll have peace of mind knowing that the repair was done right. If you have a carpet burn, don’t hesitate to call a professional carpet repair company. If you’re looking for top-notch carpet repair services in Brisbane, look no further than Invisible Carpet Repair. Our team of skilled and experienced professionals are equipped with the tools and knowledge necessary to tackle even the toughest carpet repair jobs, from minor snags and tears to major patching and re-stretching.


Also Read:

Published on: April 10, 2023

Carpeting is one of the most popular flooring options for homes and businesses alike. It’s comfortable underfoot, adds warmth to a space, and can be a beautiful design element. However, one problem that can arise with carpeting is buckling. Buckling occurs when a carpet becomes loose and begins to form ripples or waves, which can be unsightly and even dangerous. In this blog, we’ll explore the causes of carpet buckling and how to add a finished edge to your carpet.

What Degrades The Finished Edge Of A Carpet?

Carpet buckling can happen for a variety of reasons. Here are some of the most common causes:

Poor Installation: Poor installation is one of the leading causes of carpet buckling. If the carpet is not stretched tightly enough during installation, it can become loose and start to buckle. Carpet installers use special tools to stretch the carpet and ensure that it is properly installed. If the installer doesn’t use these tools or doesn’t stretch the carpet enough, it can lead to buckling.

Humidity: Humidity is another common cause of carpet buckling. When the air is humid, the carpet fibres absorb moisture and expand, which can cause the carpet to buckle. This is especially true if the carpet is installed over a concrete subfloor, which can absorb and retain moisture.

Heavy Furniture: Heavy furniture can also cause carpet buckling. When furniture is placed on top of the carpet, it can create pressure points that cause the carpet to buckle. This is especially true for furniture with narrow legs or wheels, which can put a lot of weight on a small area of the carpet.

Age: Over time, carpet can start to wear and lose its elasticity. This can be caused by foot traffic, exposure to sunlight, and other factors. When the carpet loses its elasticity, it can become loose and start to buckle.

Improper Cleaning: Improper cleaning can also cause carpet buckling. If the carpet is not cleaned properly, it can become saturated with moisture, which can cause it to buckle. This is especially true if the carpet is cleaned with a steam cleaner or if it is left wet for an extended period of time.

Follow These Steps To Add a Finished Edge to Your Carpet:

If your carpet is buckling, there are several things you can do to fix the problem. Here are some options:

Re-Stretch the Carpet: If the carpet is buckling because of poor installation, the best solution is to have it re-stretched. This involves removing the carpet, stretching it tightly, and then reinstalling it.

Use a Carpet Knee Kicker: A carpet knee kicker is a tool that can be used to stretch the carpet without removing it. This tool is useful for minor buckling problems and can be used to stretch the carpet back into place.

Adjust Furniture Placement: If the carpet is buckling because of heavy furniture, you can adjust the placement of the furniture to alleviate the pressure points on the carpet.

Install Carpet Padding: Carpet padding can help prevent carpet buckling by providing an extra layer of support between the carpet and the floor.

Hire a Professional: If you’re not sure what’s causing the carpet buckling, or if you’re not comfortable attempting to fix it yourself, it’s best to hire a professional. A professional carpet installer or repair technician can assess the problem and recommend the best course of action.

Conclusion

Carpet buckling is a common problem that can be caused by a variety of factors, including poor installation, humidity, heavy furniture, age, and improper cleaning. If you’re experiencing degraded carpet edge finishing, the best solution will depend on the cause of the problem. Re-stretching the carpet, using a carpet knee kicker, adjusting furniture placement, installing carpet padding, and hiring a professional are all options that can help fix the problem. With the right solution, you can restore your carpet to its original beauty and ensure a safe and comfortable space for your family or customers.

At Invisible Carpet Repair Brisbane, we specialise in providing expert carpet repair and restoration services, using state-of-the-art equipment and techniques to restore your carpet to its original condition. By hiring professionals for your carpet repair and restoration needs, you can enjoy peace of mind knowing that your carpet is in good hands and that you will be able to enjoy it for years to come. 


Also Read:

Published on: April 10, 2023

Carpet stretching is an essential process to maintain the longevity and appearance of your carpets. Over time, carpets can become loose or develop ripples, causing tripping hazards and an unsightly appearance. Carpet stretching involves pulling the carpet tight and securing it in place, resulting in a smooth and wrinkle-free surface. In this blog post, we’ll discuss the importance of carpet stretching, the tools needed for the job, and the steps involved in the process. 

Why is Carpet Stretching Important?

Carpets are installed over a pad or underlayment, which provides cushioning and support. Over time, the pad can become compressed, causing the carpet to loosen and develop wrinkles. Loose carpets not only create tripping hazards, but they can also wear out faster due to excessive foot traffic. Carpet stretching is crucial to prevent these issues and extend the life of your carpets. Continue reading to know about how carpet stretching is done. 

Tools Needed for Carpet Stretching

Before you begin, you will need several tools to stretch your carpets. Here are some of the essential tools required:

  • Knee kicker – A knee kicker is a hand-held tool that allows you to stretch the carpet by applying force with your knee.
  • Power stretcher – A power stretcher is a tool that allows you to stretch the carpet using mechanical force. It is used for larger rooms or carpets that require more significant stretching.
  • Carpet cutter – A carpet cutter is a sharp tool used to cut the carpet once it has been stretched.
  • Carpet tucker – A carpet tucker is a tool used to tuck the carpet edges into the baseboard.
  • Staple gun – A staple gun is used to secure the carpet in place once it has been stretched.

The Carpet Stretching Process

Once you have gathered all the necessary tools, you can begin the carpet stretching process. Here are the steps involved:

Step 1: Clear the Room

Before you begin stretching your carpet, you need to remove all the furniture and other items from the room. This will provide you with ample space to work and prevent any damage to your furniture.

Step 2: Inspect the Carpet

Inspect the carpet for any damage or wear and tear. If you find any damages, you should repair them before proceeding with the stretching process. You should also vacuum the carpet to remove any dirt or debris that might interfere with the stretching process.

Step 3: Determine the Direction of the Carpet Pile

Determine the direction of the carpet pile by running your hand over the surface of the carpet. You should stretch the carpet in the opposite direction of the carpet pile to achieve a smooth surface.

Step 4: Use the Knee Kicker

Start at one corner of the room and use the knee kicker to stretch the carpet towards the opposite wall. Place the kicker about six inches away from the wall and use your knee to apply pressure to the tool. Then, strike the padded end of the kicker with your knee to create tension in the carpet.

Step 5: Use the Power Stretcher

Once you have stretched the carpet using the knee kicker, you can use the power stretcher to stretch it further. Place the power stretcher on the carpet, about six inches away from the opposite wall. Then, push the lever to apply force to the carpet.

Step 6: Cut the Carpet

Once the carpet has been stretched to your satisfaction, use a carpet cutter to trim the excess carpet. Be careful not to cut too close to the wall or baseboard, as you need some excess carpet to tuck into the baseboard.

Step 7: Tuck the Carpet

Use a carpet tucker to tuck the excess carpet into the baseboard. Tuck the carpet at one end of the room and work your way to the other end. Be sure to use a staple gun to secure the carpet to the baseboard every few inches to ensure that it remains in place.

Step 8: Replace the Furniture

After you have finished stretching and securing the carpet, you can replace the furniture and other items back into the room.

Benefits of Carpet Stretching

Carpet stretching provides many benefits, including:

  • Prevents Tripping Hazards: Loose carpets can create tripping hazards, especially in high-traffic areas. Stretching your carpets eliminates these hazards and provides a safer environment for you and your family.
  • Improves Appearance: Ripples and wrinkles in carpets are unsightly and can detract from the overall appearance of a room. Stretching your carpets provides a smooth, wrinkle-free surface that improves the overall look of your home.
  • Extends the Life of Your Carpets: Loose carpets wear out faster due to excessive foot traffic. Stretching your carpets eliminates wrinkles and ripples that can cause excessive wear and tear, thereby extending the life of your carpets.

Get Professional Help: 

If you’re looking for the best carpet stretching and repair services in Brisbane, look no further than Invisible Carpet Repair Brisbane. Our team of experienced professionals is equipped with the skills and tools necessary to deliver high-quality carpet repair and stretching solutions that will leave your carpets looking and feeling their best. We understand that every carpet repair job is unique, which is why our technicians take the time to assess each job on an individual basis and come up with a tailored solution that meets your specific needs. From small tears to large rips, all carpet repair problems can be solved easily.


Also Read:

Published on: April 10, 2023